

Grove Beginner Kit For Arduino: Codecraft Lesson 1 - Flashing LED
ardrpi arduino
Using the Grove Beginner Kit for Arduino with CodeCraft to make an LED flash. Includes how-to “blocky-program” the lesson in CodeCraft..
| The Grove Beginner Kit For Arduino includes an Arduino Uno board with preconnected devices. The Grove lessons supporting this present coding using the Arduino IDE. These pages present the same lessons using the Codecraft IDE that uses the Block style of coding with specific Grove Arduino blocks. |
We have completed the setup. Time now to do something! Now let’s learn how to light the LED module. We know the three basic components of a control system: Input, Control, and Output. But lighting up LED uses only the output, not the input. Seeeduino is the control unit, the LED module is the output unit and the output signal is a digital signal.
Background Information:
- What is Digital Signal
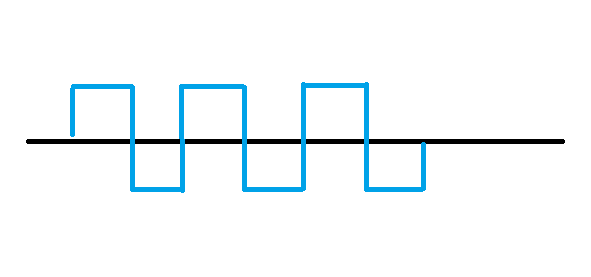
Digital signal: Digital signal refers to the value of the amplitude is discrete, the amplitude is limited to a finite number of values. In our controller, the digital signal has two states: LOW(0V) for 0; HIGH(5V) for 1. So sending a HIGH signal to LED can light it up.
Grove Beginners Kits Components
| Component | Interface | Pins/Address |
|---|---|---|
| LED | Digital | D4 |
| Buzzer | Digital | D5 |
| OLED Display 0.96” | I2C | I2C, 0x78(default) |
| Button | Digital | D6 |
| Rotary Potentiometer | Analog | A0 |
| Light | Analog | A6 |
| Sound | Analog | A2 |
| Temperature & Humidity Sensor | Digital | D3 |
| Air Pressure Sensor | I2C | I2C, 0x77(default) / 0x76(optional) |
| 3-Axis Accelerator | I2C | I2C, 0x19(default) |
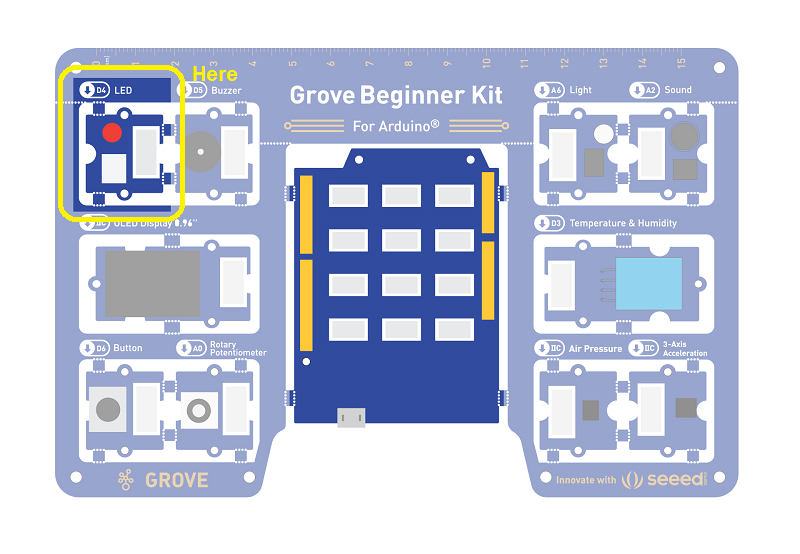
Components used for this lesson are highlighted.
- Components Involved
- Grove Beginner Kit
- Grove LED
Hardware connection
- Module connection
- Components are already connected.
- This module is connected through D4
- Connect the Seeeduino to the computer through the USB cable.
Implement Software Code
- Open CodeCraft IDE.
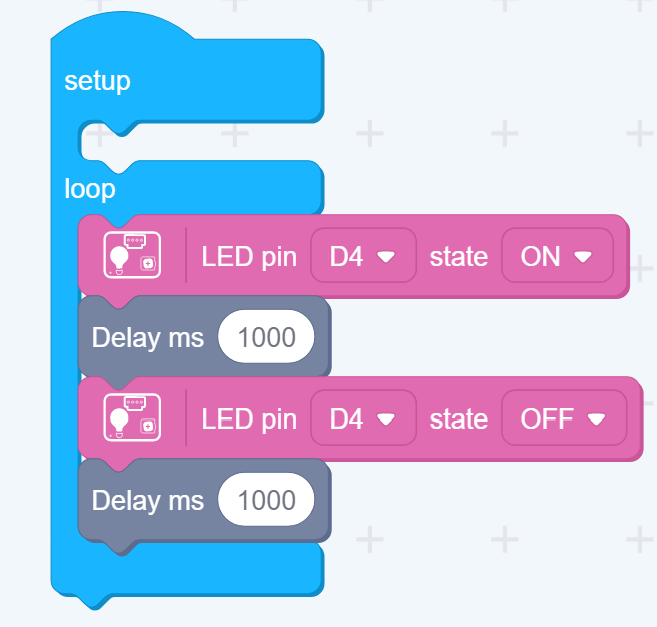
- Create the code block as below.
- Upload the app.
The LED will turn on for one second and then turn off for one second.
2. Implement the code block.
How to create this …
Watch the video on Youtube:
Code Analysis
Setup
D4 is auomatically set to output as used with the LED.
Loop
- Set D4 to Hi and so turn the LED on
- Delay for 1000ms (1 second)
- Set D4 to Lo and so turn the LED off
- Delay for 1000ms
Loop means this gets continuously repeated.
3. Upload the app
We can upload the completed program to Arduino to make it effective, so please connect your Arduino to your PC. You can find the serial port number of Arduino in Device Manager, remember it for future use.
Now click upload in Codecraft’s lower right corner, choose Arduino’s serial port number. Confirm it and wait for a while, you will see an LED blinking on the kit, top left hand corner.
Outcome:
The LED module will be 1 second on and 1 second off.
LED Brightness Adjustment:
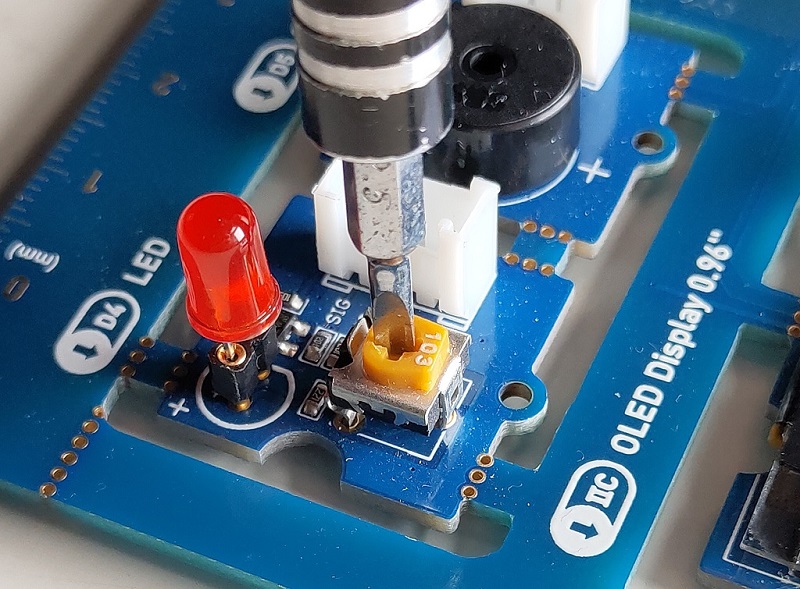
On the Grove LED module, there is a variable resistor that can be adjusted using a screw driver. Twist it to make the LED light up brighter!
| Topic | Subtopic | |
| This Category Links | ||
| Category: | Grove Arduino Index: | Grove Arduino |
| Next: > | Grove Beginner Kit For Arduino | Download program to board |
| < Prev: | Grove Beginner Kit For Arduino | Setup |


