

GPS: IOT Hub Mapping App
web gps nmea
A previous post, RPI-Pico-Arduino-AzSDK: Bluetooth and GPS and its related GitHub repository encompasses GPS processing on a RPi Pico from basic reception through to sending location information to an Azure IoT Hub. The project presented here encompasses that location Telemetry as well as Blazor app to track the location on a map. The repository is 2 projects: The last Arduino Sketch from the previous project that sends the telemetry as well as the Blazor server app for mapping the data in a live or a replay manner.
Azure IoT Central provides the infrastructure for presenting data sent to an IoT Hub for a number of scenarios. This project is an attempt to do similar but in a simpler manner. It uses a Blazor Telerik Map control The RPi Pico requires a GPS NMEA device. This generally streams GPS data as textual NMEA sentences ( about NMEA ) serially over Bluetooth or RS232. The following device (that physically connects through RS232) has been used with these projects:
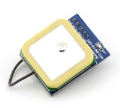
A typical GPS Device, suitable for Arduino use

Tap and rotate phone to enlarge.
The Blazor GPS Mapping App
Links
Getting Started
In the Azure Portal (or otherwise) create an Azure IoT Hub and related Device. Staying with the Azure Portal, get the required Identity parameters thus:
- “HubConnectionString”: The IoT Hub connection string
- On the left-side pane of your IoT hub, select Shared access policies
- From the list of policies, select the service policy.
- Copy the Primary connection string.
- For the Sketch just use the Primary key from here, not the Connection string.
- “DeviceId”: The target device’s Id
- “EventHubConnectionString”: The Endpoint
- Go to the IoT Hub in Azure Portal
- Select Built-in endpoints
- Scroll down to Event Hub compatible endpoint
- Select the Endpoint
OR
If you have Azure Cli installed.
- Create an azcli prompt and login
- Run
az iot hub connection-string show -n <IoT Hub name> --policy-name service --key-type primary - Run
az iot hub connection-string show -n <IoT Hub name> --default-eventhub - Run
az iot hub device-identity connection-string show --device-id <IoT Device name> --hub-name <IoT Hub name>}- The device Primary Key can be extracted from this by inspection.
For the Sketch, add hub and hub/device identity parameters in iot_configs.h. Parmeters required:
#define IOT_CONFIG_WIFI_SSID ""
#define IOT_CONFIG_WIFI_PASSWORD ""

#define IOT_CONFIG_WIFI_SSID_MOBILE ""
#define IOT_CONFIG_WIFI_PASSWORD_MOBILE ""

// Azure IoT
#define IOT_CONFIG_IOTHUB_FQDN "" //eg. HUBNAME.azure-devices.net
#define IOT_CONFIG_DEVICE_ID ""
#define IOT_CONFIG_DEVICE_KEY "" //The device Primary Key
Note that two WiFis can be added. The WiFi is selected by defining useMobile in the main file. This facilitates using a phone when moving the device around.
For the Blazor app, you will need a Telerik license, whether a full license or a 30 day trial. Follow the steps as below3 at First Steps with Server-Side UI for Blazor
- Step 1: Download Telerik UI for Blazor
- Step 2: Add the Telerik NuGet Feed to Visual Studio
- Step 3: Install the Telerik UI for Blazor Components The other steps have been implemented in the project.
Azure IoT Hub and Device
Now open this project and add your connection details in appsettings.json:
  "HubConnectionString": "",
  "EventHubConnectionString": "",
  "HubName": "",
  "DeviceId": "",
Footnote
If running the Blazor app in development mode, the app can be opened in a phone browser locally using ngrok as
per the blog post:
Blazor Server Development: Viewing in a phone
| Topic | Subtopic | |
| This Category Links | ||
| Category: | Web Sites Index: | Web Sites |
| Next: > | GPS | What3Words Mapping - 1 |
| < Prev: | Blazor Server Development | Viewing on a phone |


