

Grove Beginner Kit For Arduino: Codecraft Lesson 5 - Light Intensity
ardrpi arduino
Using an LDR sensor to determine the light intensity and turning the LED off/on depending upon the level.
| The Grove Beginner Kit For Arduino includes an Arduino Uno board with preconnected devices. The Grove lessons supporting this present coding using the Arduino IDE. These pages present the same lessons using the Codecraft IDE that uses the Block style of coding with specific Grove Arduino blocks. |
The light sensor contains a photosensitive resistor to measure the intensity of light. The resistance of the photosensitive resistor decreases with the increase of light intensity. The LED will light up if the surrounding is dark, and stays off if the surrounding is bright. There will be a trigger point in terms of the sensor value.
In the second section, we will use Serial Monitor to observe results from the sensor.
Grove Beginners Kits Components
| Component | Interface | Pins/Address |
|---|---|---|
| ==LED== | ==Digital== | ==D4== |
| Buzzer | Digital | D5 |
| OLED Display 0.96 | I2C | I2C, 0x78(default) |
| Button | Digital | D6 |
| Rotary Potentiometer | Analog | A0 |
| Light | Analog | A6 |
| ==Sound== | ==Analog== | ==A2 == |
| Temperature & Humidity Sensor | Digital | D3 |
| Air Pressure Sensor | I2C | I2C, 0x77(default) / 0x76(optional) |
| 3-Axis Accelerator | I2C | I2C, 0x19(default) |
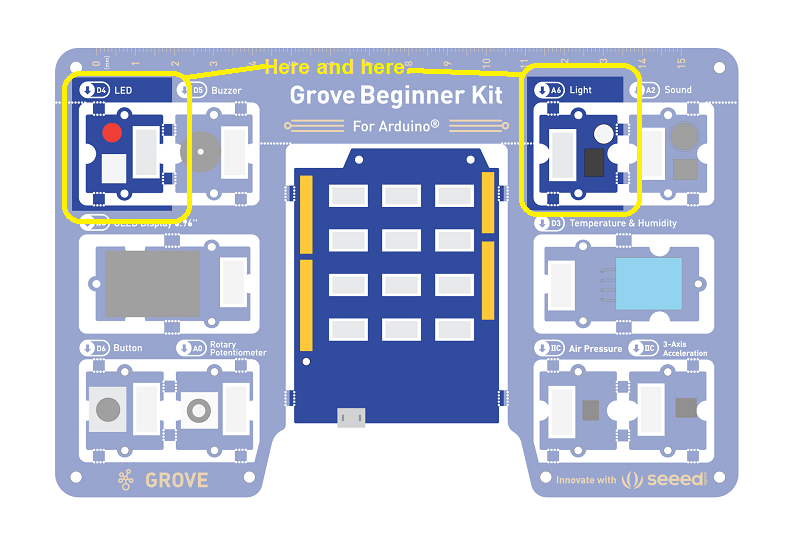
Components used for this lesson are highlighted.
- Components Involved
- Grove Beginner Kit
- Grove LED
- Grove Light Sensor
2. Implement the code block.
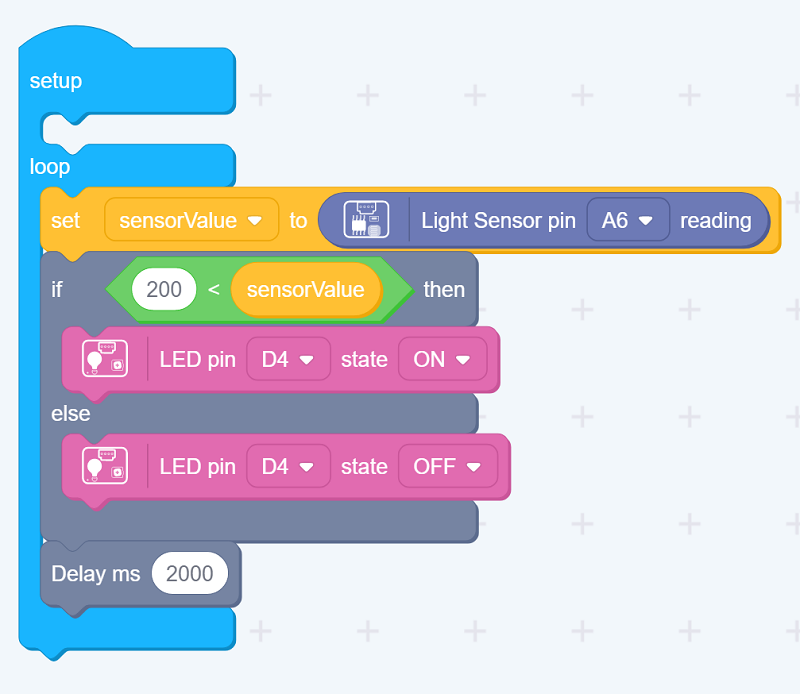
For this lesson, the buzzer sounds when the button is pressed. The LED lights when the button is not pressed.
How to create this …
Watch the video on Youtube:
2Do: Ignore as this is a place holder.
3. Run the app
Download the app to the board, as in an earlier lesson.
Outcome
The LED module will light up if it’s bright and stay off if it’s dark. Cover it up with fingers.
Serial Monitor
The Serial Monitor is able to periodically display data, particularly ADC data. Lets display the Light Intensity data.
Background Information:
- What is the Serial Monitor
The Serial Monitor is a useful tool to observe results on Arduino, it can be very useful in terms of printing results from the sensors or debugging in general. You can also send data back to the controller via the serial monitor to do certain tasks! Note: Make sure the Serial data transfer match with the code.
1. Implement this code block:
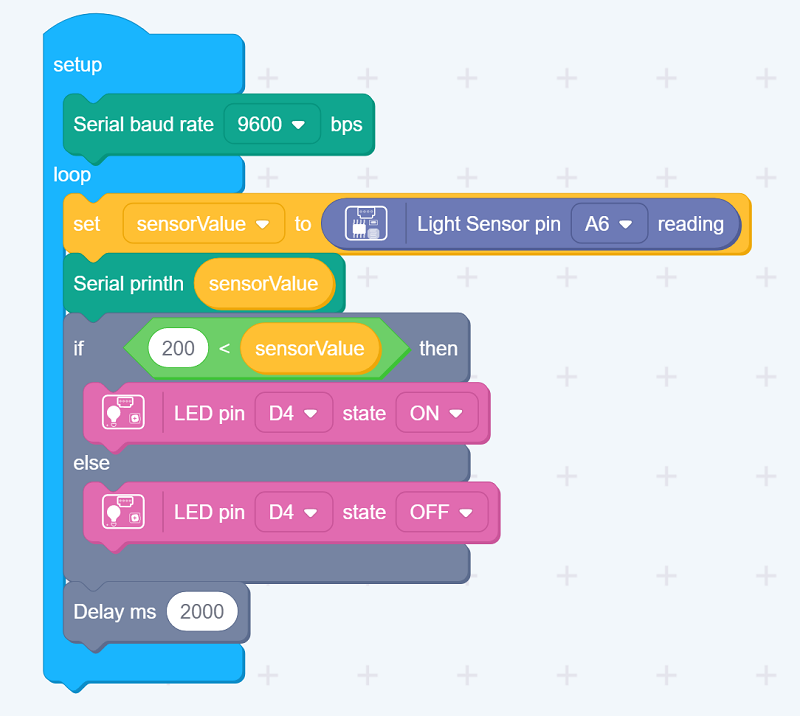
Then download and run the app.
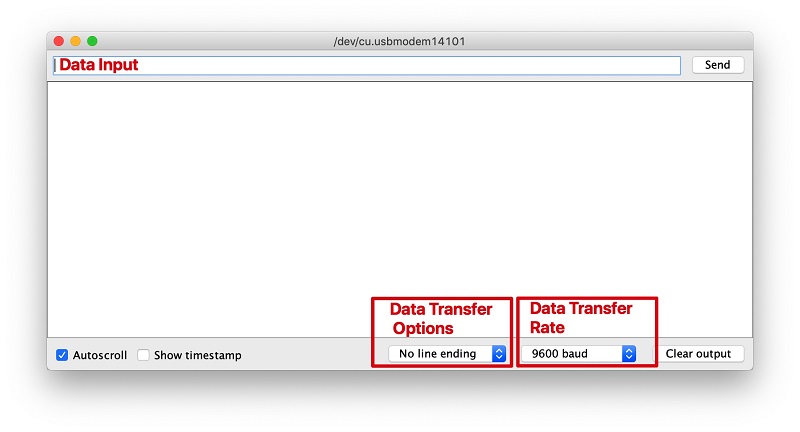
3. Follow these steps to open the serial monitor:
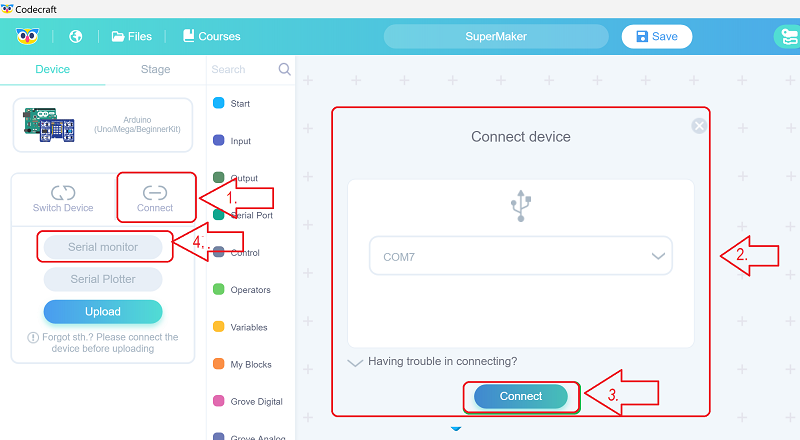
The display will be something like:
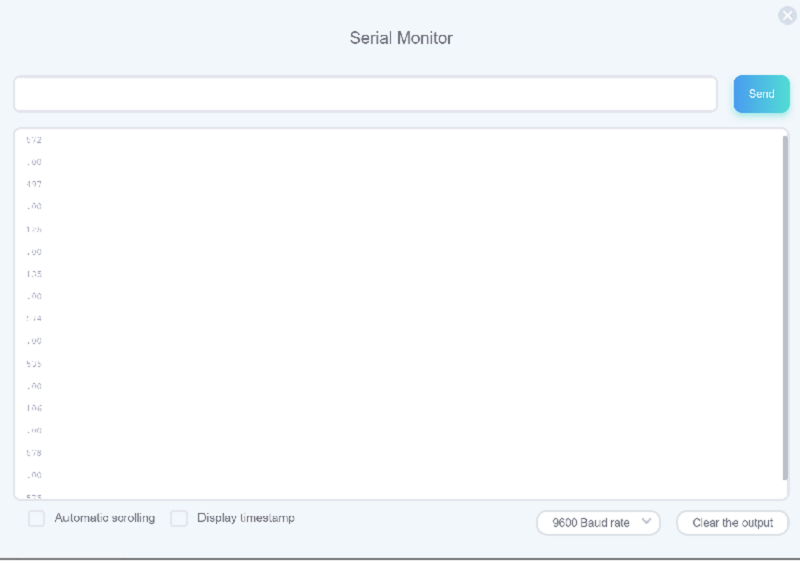
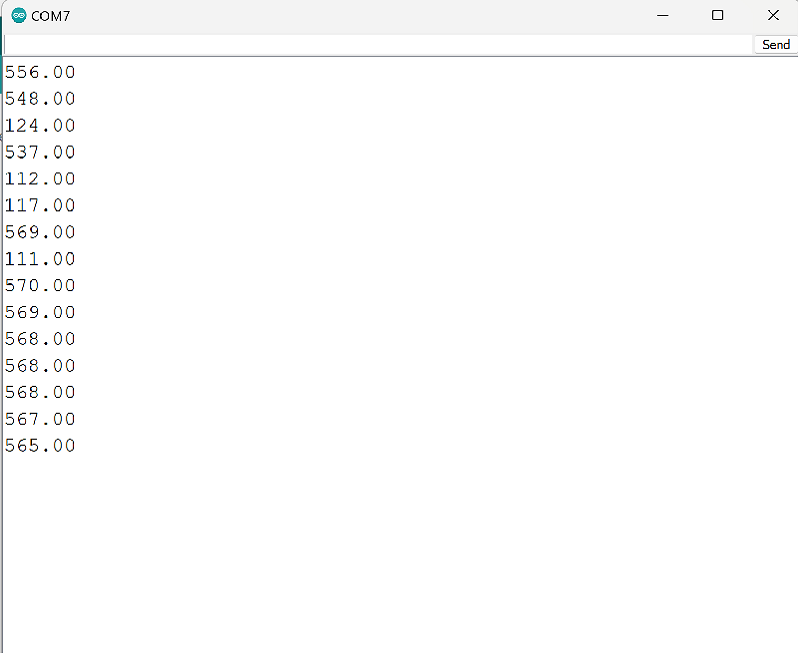
If you find, like me, that the serial monitor in CodeCraft is poor you may wish to use another serial monitor such as that in the Arduino IDE:
Outcome
The software running on the computer communicates with the development board, and the baud rate is 9600
| Topic | Subtopic | |
| Next: > | Grove Beginner Kit For Arduino | Codecraft Lesson 6 - Sound Sensitive LED Light |
| < Prev: | Grove Beginner Kit For Arduino | Codecraft Lesson 4 - Making the Buzzer go BEEP |
| This Category Links | ||
| Category: | Grove Arduino Index: | Grove Arduino |


