

Grove Beginner Kit For Arduino: Codecraft Lesson 6 - Sound Sensitive LED Light
ardrpi arduino
Determining the intensity of sound to turn an LED on/off. This page hasn’t been converted to Blocky style yet.
| T he Grove Beginner Kit For Arduino includes an Arduino Uno board with preconnected devices. The Grove lessons supporting this present coding using the Arduino IDE. These pages present the same lessons using the Codecraft IDE that uses the Block style of coding with specific Grove Arduino blocks. |
The sound sensor can detect the sound intensity of the environment, and its output is also simulated. I’m sure you’ve all been exposed to the sound control lights, but now we can do one ourselves, and with the basics, this experiment will be easy for you. Here used Serial Plotter to visualize results.
Background Information:
- What is Serial Plotter
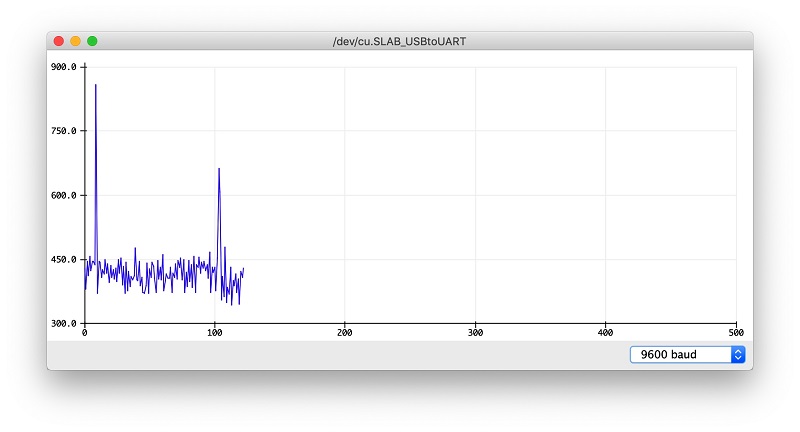
Serial Plotter is similar to Serial Monitor, allowing you to natively graph serial data from your Arduino to your computer in real-time. This is very useful when data needs to be visualized.
You can open the Serial Plotter by clicking Serial Plotter on left aftrer setting teh connectioon. You can also use teh Serial Plotter in the Arduino IDE, teh result of the lesson is shown at the end of this post.
- Practice: The LED lights light up when the sound is made. or quieter, the LED lights go off.
1. Grove Beginners Kit Components
| Component | Interface | Pins/Address |
|---|---|---|
| LED | Digital | D4 |
| Buzzer | Digital | D5 |
| OLED Display 0.96” | I2C | I2C, 0x78(default) |
| Button | Digital | D6 |
| Rotary Potentiometer | Analog | A0 |
| Light | Analog | A6 |
| Sound | Analog | A2 |
| Temperature & Humidity Sensor | Digital | D3 |
| Air Pressure Sensor | I2C | I2C, 0x77(default) / 0x76(optional) |
| 3-Axis Accelerator | I2C | I2C, 0x19(default) |
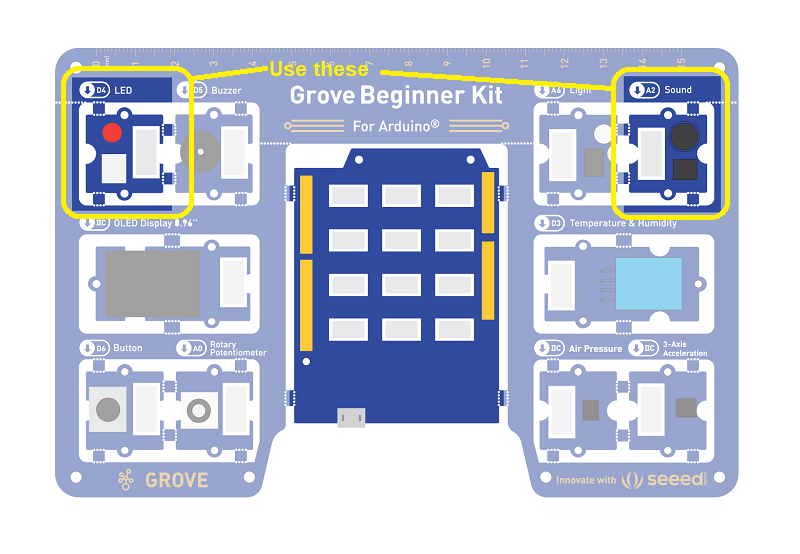
Components used for this lesson are highlighted.
-
Components Involved
- Grove Beginner Kit
- Grove LED
- Grove Sound Sensor
This lesson is similar to many of the previous lessons in that the LED goes on if a certain conditiona is met. In this case if the sensor value is below a threshold.
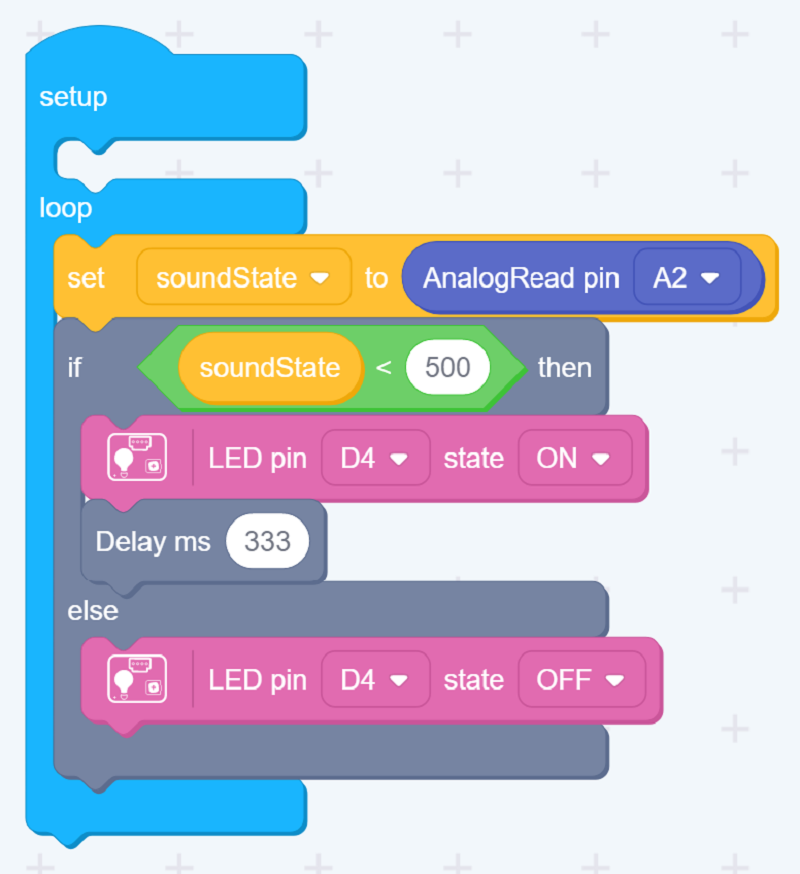
Simplified version
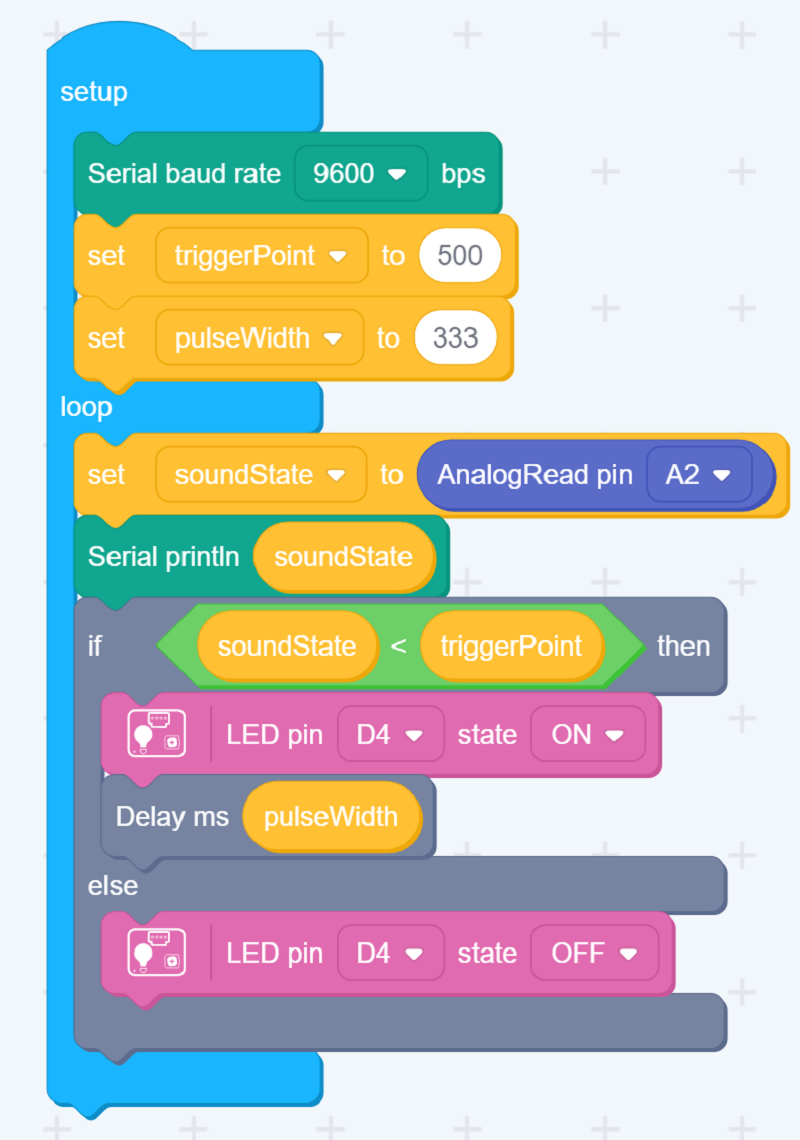
2. Implement the code block:
How to create this …
Watch the video on Youtube:
2Do: Ignore as this is a place holder.
3. Run the app
Download the app to the board, as in previous lesson
Outcome:
The LED module will light up if the surrounding is loud enough.
You can also see the light intensity readings from the Serial Plotter.
Note: You can also adjust the triggerPoint value according to your surrounding light intensity, and also set the period that the LED is on for each sound detection.
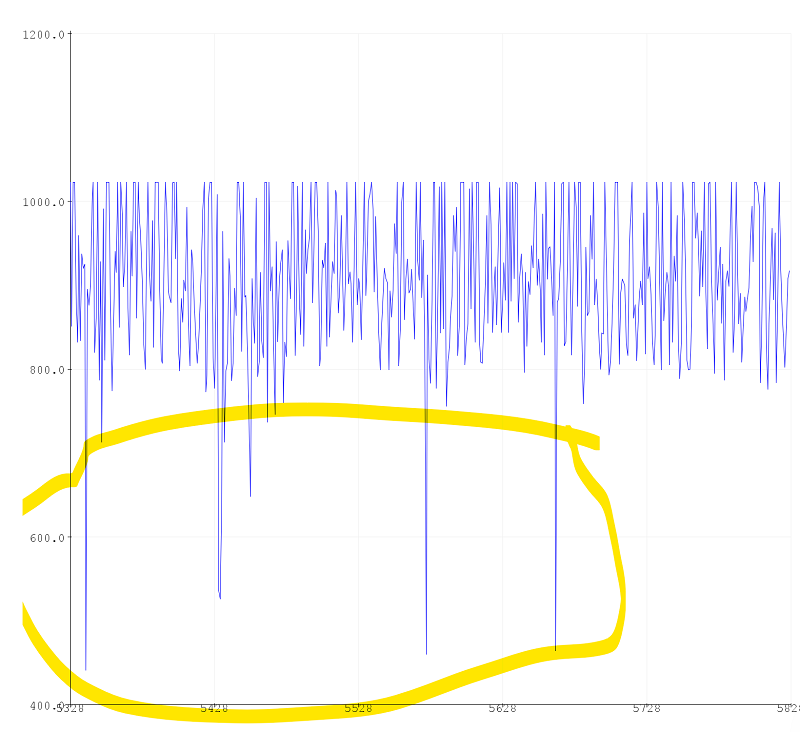
Arduino Serial Plotter: Note hand claps are circled. Value decresses for these.
Demo Effect and Serial Print Result:
The LED module will light up if the surrounding is loud enough.
| Topic | Subtopic | |
| Next: > | Grove Beginner Kit For Arduino | Codecraft Lesson 7 - Displaying Data on an OLED |
| < Prev: | Grove Beginner Kit For Arduino | Codecraft Lesson 5 - Light Intensity |
| This Category Links | ||
| Category: | Grove Arduino Index: | Grove Arduino |


