

Azure DevOps-Blob Storage Credentials
This blog covers the creditialing required when doing a Release from and Azure Devops pipeline after the Jekyll Blog Site has been built by the pipeline. An issue arose when the account used for Devops lost its subscription to Azure, but not Azure Devops.
This blog site is engineered as a custom Jekyll web site. It is authored used Markdown in VS Code and MS Word. posts can be previewed using the a VS Code previewer, or the site can be built locally and the service run there. When a post is complete is submitted to an Azure Devops repository which triggers the pipeline to build and deploy the content to Azure Blob Storage. From there it is available as a static web site.
As blogged previously here, this mechanism is based upon the detailed series of posts by Carl-Hugo Marcotte (thanks again). THe links to thos posts are availble here. The issue in point here is part of the third post in that series. Some other related posts on this site in the Web category.
Due to my Azure credits I get monthly with one login I use, the Blob Storage on Azure is in the Subscription for that account. For various hostorical reasons which I won’t go into here, the Azure Devops account is different. That has been fine until recently. That account did have on-going Azure credits as well. But recently the second account’s subscription ran out. I had had it for a long time so I thought it was perpetual, but als they caught up we me. Th impact of this was the Devops pipeline still reposited the content and built it OK. The artifact was passed to the Release stage which was configured to delete the existinh Blob Storage conatent then upload the newly built content. Both tasks now failed. I eventually found a resolution for this so I am documenting my solution for anyone who comes across this problem, and for my lack of long term memory!
Those who don’t record hostory are apt to repeat it.
The Error Message
Error Code: [1]
Error: Azure login failed
Script failed with error: Get Token request returned http error: 401 and server response: {"error":"invalid_client","error_description":"AADSTS7000222: The provided client secret keys are expired. Visit the Azure Portal to create new keys for your app, or consider using certificate credentials for added security:
...
...
,"error_uri":"https://login.microsoftonline.com/error?code=7000222"
The Release Inline scripts
az storage blob delete-batch --source $(containerName) --account-name $(storageAccount) --output table
The Delete Task
az storage blob upload-batch --source _site --destination $(containerName) --account-name $(storageAccount) --output table --no-progress
The Upload Task
Nb » My first attempt was to just regenerate the Blob Storage keys, but that was misdirected. Its the App Screte Keys that needs upadting
Resolution
- Logon to the DevOp project using the credentials of that are used to login to Azure to access the Blob Storage.
You may need to add that user to the project users, at a suitable level. - Click on Pipelines and select the pipeline (probably only one).
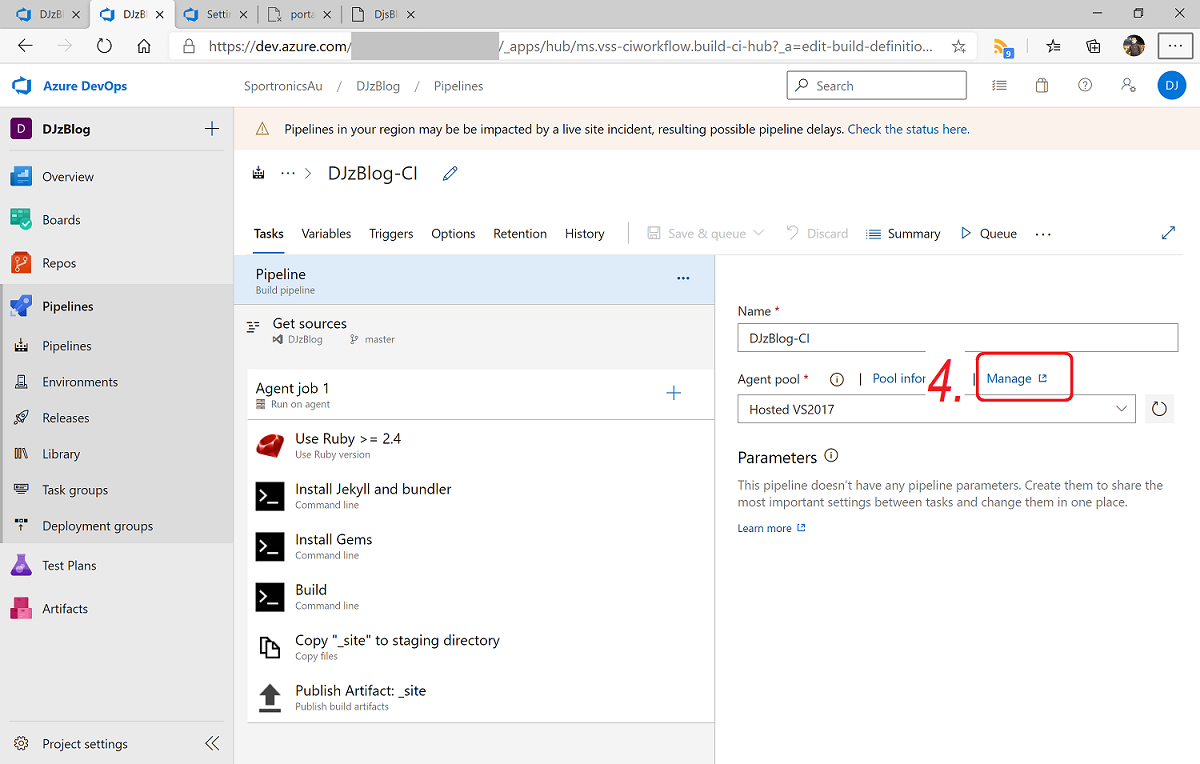
- Click on [Edit]
- Click on Manage (near Agent Pool*)
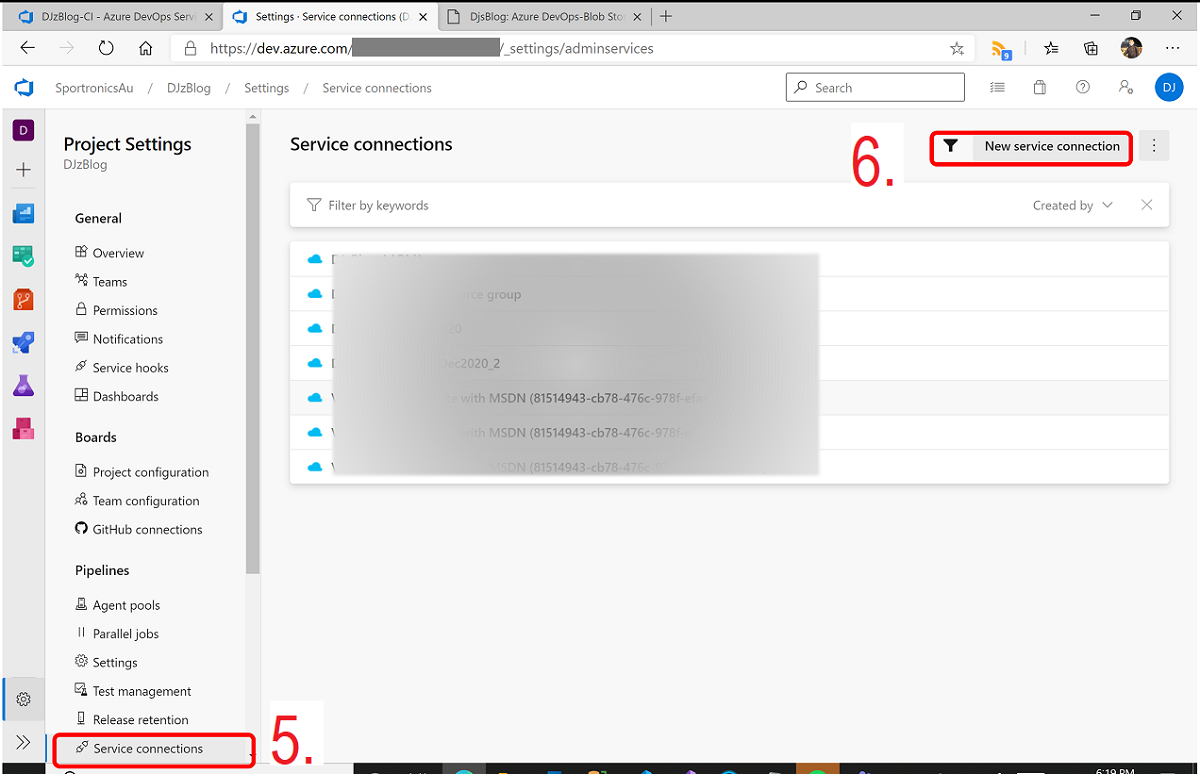
- On menu on left, under Pipelines, click on ** Service connections**.
- Click on [New Service Connection]
- Select Azure Resource Manager then [Next]
- Leave Service principal (automatic) selected and press [Next]
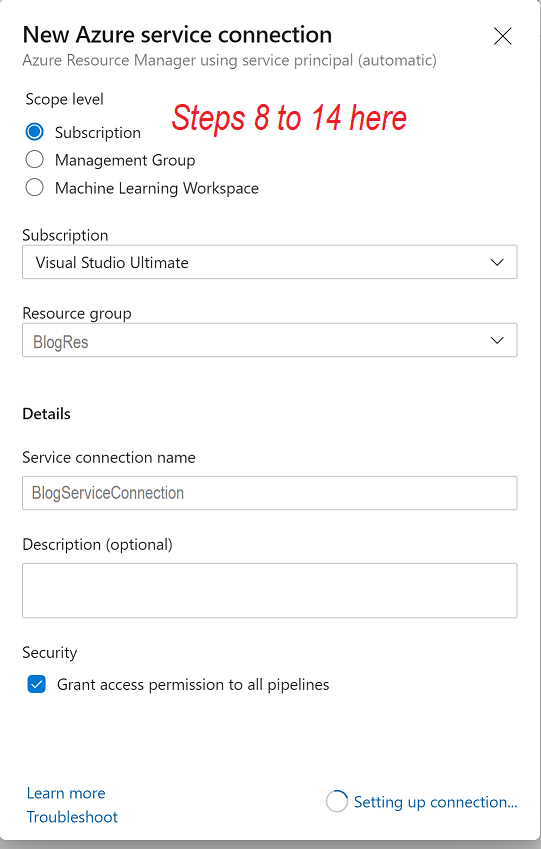
- I used Scope: Subscription
- Wait for it to load (Azure) Subscriptions. You may need to login, with the Azure Blog Storage credentials.
- Select the subscription for the subscription that has the BlobStorage.
- Select the Resource group that has the Blob Storage
- Give the Service Connection a suitable and unique name, and a Desciption if you wish.
- Press [Save]
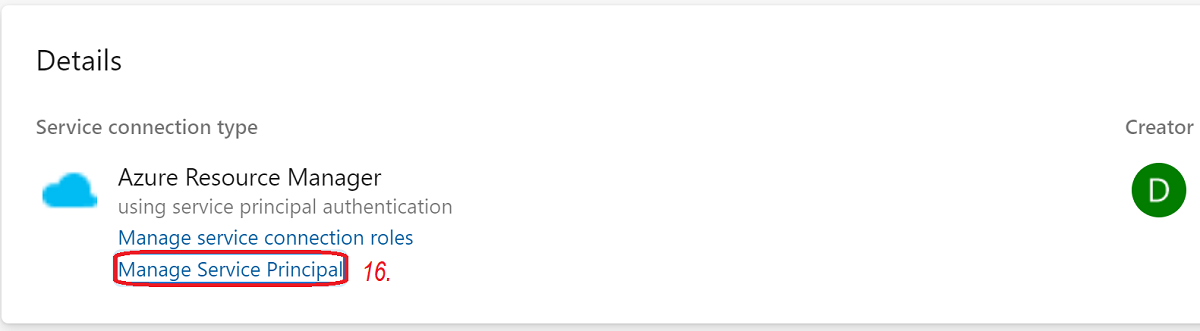
- When generated select it.
- Select Manage Service Principal (bottom left).
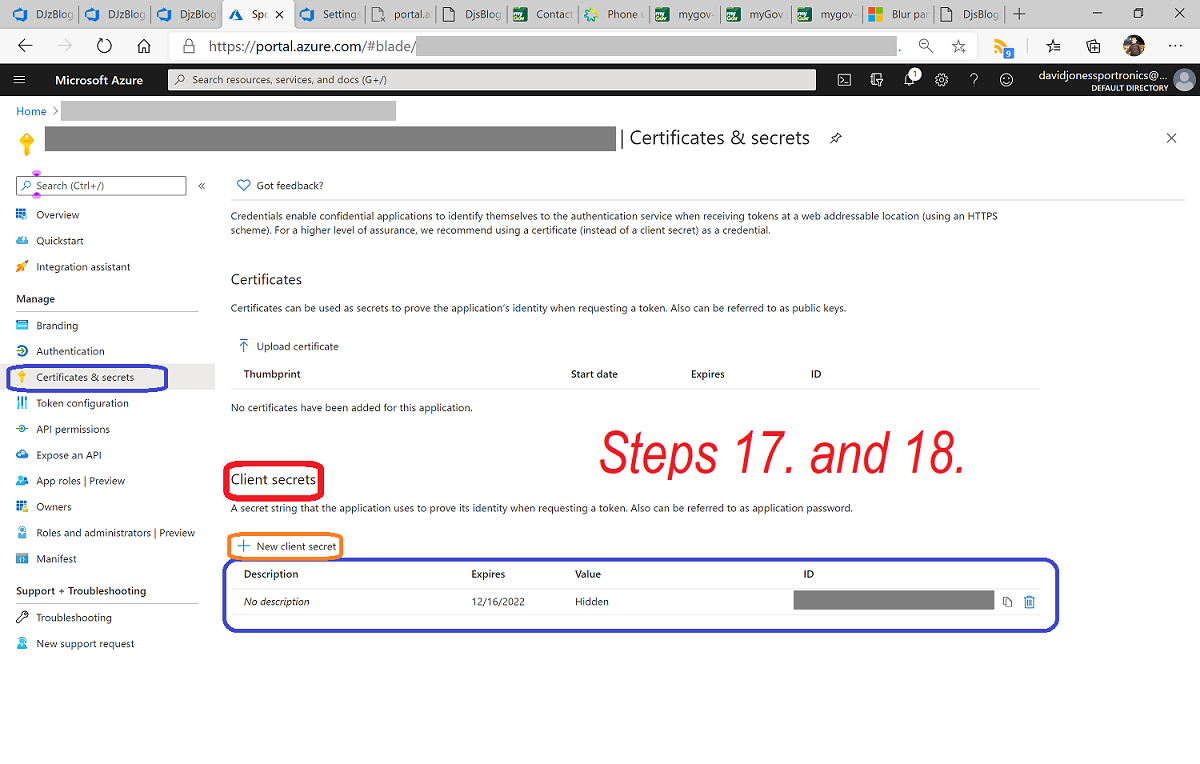
- Click on Certificates and Secrets.
- Check that the Client Secret is OK. Create a new one if not and delete the old expired one.
If there isn’t one create a new Client Secret. - Back in the Project Menu choose Pipelines-Release
- Then click on [Edit]
- In Stages-Stage 1click on 2 tasks
- Click on the first task (Delete). From the Subscription drop down menu ..choose the Service Connection you created previously (as per the name in 13.). [Save] it
- Repeat 22. for the second task (Upload)
- Done!
Nb » You might be able to login to Azure Devops with the original account, but use the Azure Blob Storage one in step 9.
| Topic | Subtopic | |
| Next: > | Blazor Helpers App | Overview of a Database oriented App |
| < Prev: | Azure Sphere | IoT Central Scripting Limitations |
| This Category Links | ||
| Category: | Web Sites Index: | Web Sites |
| Next: > | Azure Devops Jekyll Site | Ruby Version 3 issue |
| < Prev: | More on creating this blog site |


