

WPF: Sideloading
appdev wpf sideloading apps installer certificate
To publish a WPF app for sideloading outside of the Microsoft Store, you typically need to create an installer package (like an MSI or EXE) and sign it with a code signing certificate. This ensures that users can trust the application they are installing. In building the install package you can create a self-signed certificate for testing purposes, but for production use, it’s recommended to obtain a certificate from a trusted Certificate Authority (CA). This post covers the steps for installing a self-signed certificate to allow the WPF app to be installed on target systems.
To distribute an app you need to create an installer package. (Or you could create a ClickOnce distribution) You can use tools like WiX Toolset, InstallShield, or Visual Studio Installer Projects to create an installer for your WPF application. A Visual Studio Installer Project was used with the AthStitcher WPF app. The self-signed installer package will by default be blocked by Windows on target systems. At issue then is how to get around this by willing users of the app.
Creating the Self-Signed Certificated Package
A “Universal Windows” app was created to create the WPF install package. GitHub Copilot was used to generate project and can be viewed at AthStitcherInstall (coming) as part of the PhotoTimingDjaus repository. This packages the AthSticher app/exe into an installer package.
When building the installer package, you can create a self-signed certificate which is used to sign the installer package, which helps establish trustworthiness during installation. The certificate here is created at the behest of the developer without involving a trusted CA so its up the end user to accept, or not, this certificate. The alternatives are to use a Trusted CA to get a code signing certificate, which costs money, or publish via the Microsoft Store for which the certificate is created when published to the Store. (??or use ClickOnce deployment??).
Steps for creating the WPF app install package with self-signed cert
- From the VS Extensions menu get the Microsoft “Single project MSIX Packaging Tools” extension and install it.
- In Visual Studio, create a new “Windows Application Installer Project”.
- Add your WPF application to the installer project, for example in the Install project file:
In PropertyGroup section add:
<PropertyGroup>
  <EntryPointProjectUniqueName>..\AthStitcher\AthStitcher.csproj</EntryPointProjectUniqueName>
</PropertyGroup>
In ItemGroup section add:
  <ItemGroup>
    <ProjectReference Include="..\AthStitcher\AthStitcher.csproj" />
  </ItemGroup>
- Open the Package.appmanifest file in Visual Studio and add any details needed like publisher name, app name, etc. Also add a 400px x 400px image for the logo and generate other images. Note it needs to be of limited size, about 200k.
- On The Application tab make sure that you set the Display name to the app being packaged, not the installer app name.
- From the Packaging tab you can create the self-signed certificate. [Choose Certificate]->[Create]
- Right-click on the project and select Publish
- Select Sideloading as the distribution method
- [Next]
- Choose to create a new self-signed certificate, if not done previously.
- Provide the necessary details for the certificate . Make a note of the password you use.
- Once generated click on the Trust button to install the cert on your development system. On other systems this is handled below.
- Add a Timestamp server such as http://timestamp.digicert.com
- [Next]
- Choose a folder to publish to
- Select the target/s framework (eg. x32)
- [Create]
- The installer files will be created in the specified folder.
Nb Can publish x86 from VS, via Publish as above. With x64 get error. As an alternative, you can build the packages using the following. Use the following commands from Developer Command Prompt for VS 2022 to build x64 _(and x86) versions:_
MSBuild.exe ".\AthStitcherInstall\AthStitcherInstall.wapproj" /t:Restore,Rebuild /p:Configuration=Release /p:Platform=x86 /v:m
MSBuild.exe ".\AthStitcherInstall\AthStitcherInstall.wapproj" /t:Restore,Rebuild /p:Configuration=Release /p:Platform=x64 /v:m
Installing the Certificate on Target Systems
On the target system you need to install the cert for the app as follows:*
- Having downloaded the .msix WPF installer file to the desktop …
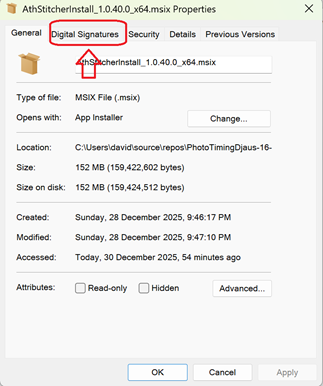
- Locate it in File Explorer
- Right click on it and select Properties
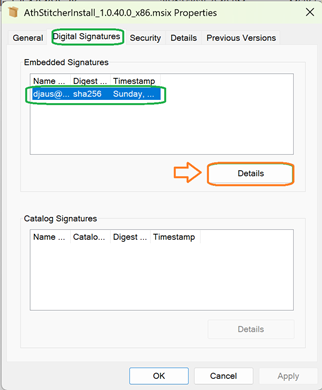
- Click on Digital Signatures tab
- Click on the one item in Embedded Signatures = Click on Details button
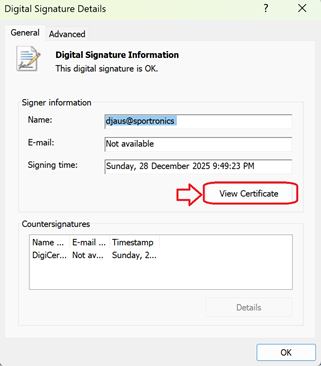
- Click on View Certificate button
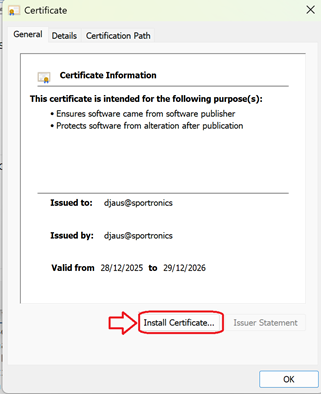
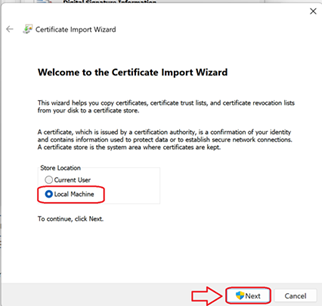
- Click on Install Certificate button
- Select Local Machine and click Next
- Accept the UAC query
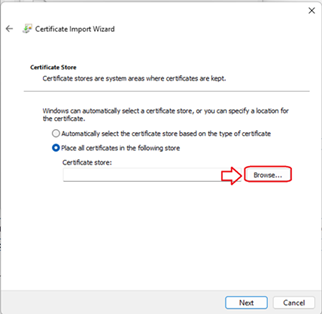
- Select Place all certificates in the following store
- Click on Browse button
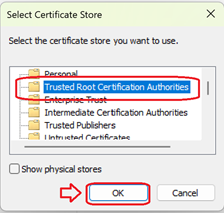
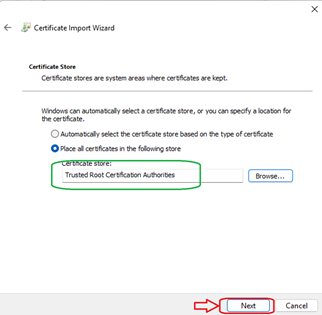
- Select Trusted Root Certification Authorities
- Click OK
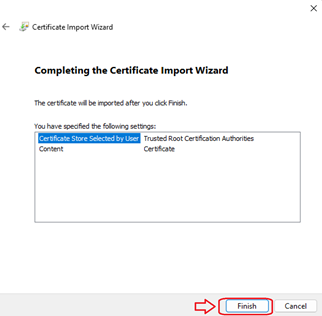
- Click Next
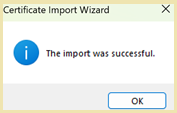
- Click Finish
- You should get a message that “The import was successful”.
- You might try the other 2 as below as well:
Best practice for test/self-signed certs:
- Install into Local Machine (not Current User)
- Store(s) that usually work:
- Trusted Root Certification Authorities
- Trusted People
- (sometimes) Trusted Publishers
Images of accepting the certificate on target system
Accept the UAC prompt when it appears
| Topic | Subtopic | |
| This Category Links | ||
| Category: | Application Dev Index: | Application Dev |
| Next: > | GitHub | Codespaces |
| < Prev: | Photo Finish | Getting Started |


